

































How to Create a Warehouse Location Numbering System: Format, Rules and a Worked Example



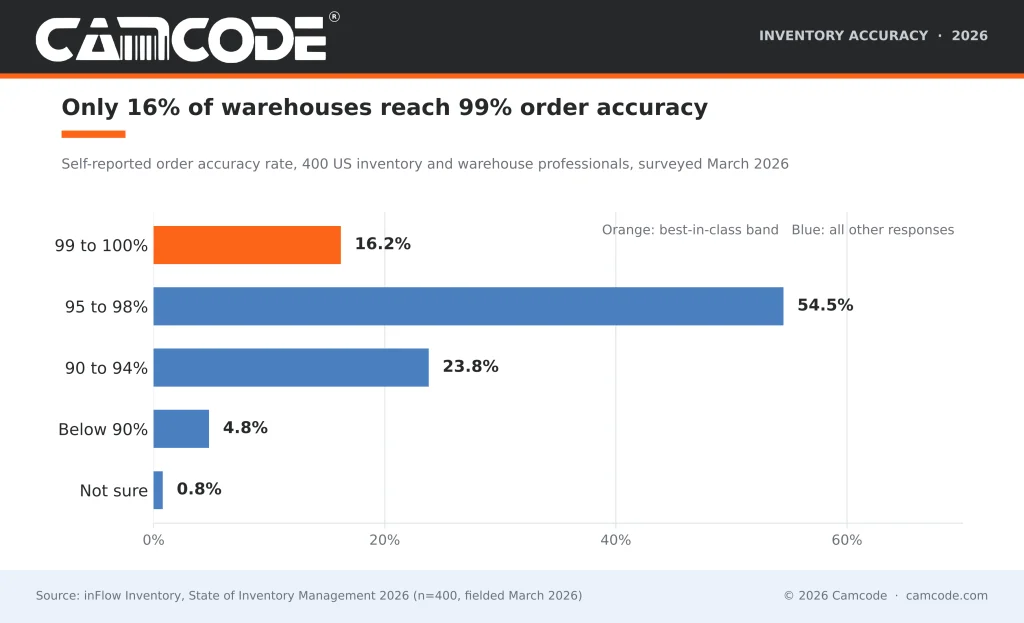
Only 16% of warehouse operations reach 99 to 100% order accuracy, and 55% run at 95 to 98%, according to inFlow’s State of Inventory Management 2026 survey of 400 US operators. A warehouse location numbering system closes part of that gap: it gives every zone, aisle, bay, level and position a unique code, so a picker, a putaway driver and the warehouse management system (WMS) all point at the same shelf. This guide covers the code format, the rules for digits, letters and gaps, a worked example for a 3,136-location warehouse and the labels that make the numbers scannable.
The numbering system is the part most operations skip when they buy WMS software. The software can only direct a picker to a location it can name, and the picker can only confirm the pick if that name is printed on the rack.
Order picking already accounts for up to 55% of warehouse operating expense, per de Koster, Le-Duc and Roodbergen’s review in the European Journal of Operational Research, and roughly half of a picker’s time is travel. Every wrong turn caused by an ambiguous location code is paid for twice: once in the walk and again in the mispick.
A warehouse location numbering system is a code scheme that gives every storage location in a warehouse a unique address, so the WMS, the pick list and the label on the rack all describe the same spot. Each address is built from the physical hierarchy of the building: the zone, the aisle, the bay (the rack section between two uprights), the level (the shelf or beam counted up from the floor) and the position (the slot on that level, counted left to right). A code such as D-07-23-3-2 reads as zone D, aisle 07, bay 23, level 3, position 2.
The WMS stores the code against every SKU and quantity, the picker scans it to confirm a pick and the putaway driver scans it to confirm where a pallet went. The numbering system is therefore the first step in warehouse location mapping, not an afterthought to it. Get the scheme wrong and every downstream process (slotting, cycle counting, replenishment) inherits the confusion.
The uninitiated tend to number in the simplest way, usually a running sequence down each aisle, which breaks the first time a rack is added or a zone is split. A good scheme encodes where a location is, not the order in which someone walked past it.
Each storage location in a warehouse is assigned a unique address.
“When product is put away, the storage location should also be scanned to record where the product has been placed.” – John J. Bartholdi III and Steven T. Hackman, Georgia Institute of Technology. Warehouse & Distribution Science, Release 0.98 (2017), Sections 2.4 and 3.2
Unique, scannable and recorded at putaway: those three words are the whole specification. The rest of this guide is about choosing addresses that people can also read at a glance from a forklift seat.
The standard warehouse location code format runs from the largest element to the smallest: zone, aisle, bay, level, position. Most warehouses need four to six fields. Separate the fields with a dash or a period, pad numeric fields to a fixed width with leading zeros (aisle 07, not aisle 7) and keep the same width in every zone, so codes sort correctly in the WMS and read the same on every label.
Here is what each field identifies, how wide to make it and what the field looks like in the example code D-07-23-3-2:
CAMCODE| Field | What it identifies | Typical width | Example |
|---|---|---|---|
| ZZone | A functional or environmental area: dry goods, cooler, bulk, returns. Letters work here because most warehouses have fewer than six zones. | 1 letter or 1 digit | D (dry goods) |
| AAisle | The walkway between two rack rows. Numbered from one wall of the building toward the other. | 2 digits (01 to 99) | 07 |
| BBay | The rack section between two uprights. Odd numbers on one side of the aisle, even on the other, low numbers at the same end of every aisle. | 2 digits (01 to 99), 3 if any aisle has more than 99 bays | 23 |
| LLevel | The beam or shelf, counted up from the floor. Level 1 is the floor position. | 1 digit (1 to 9) | 3 |
| PPosition | The pallet slot or bin on that level, counted left to right as you face the rack. Pallet rack usually has two per level; shelving can have four to eight. | 1 digit for pallet rack, 2 digits for shelving and bins | 2 |
Two conventions keep the code readable on the floor. First, every field keeps the same width everywhere, so a scanner, a spreadsheet and a new hire all parse D-07-23-3-2 the same way. Second, the code describes the physical spot, never the product in it. SKUs move; the bay does not.
Separators cost a character each but they are worth it. D072332 is seven characters a person has to parse; D-07-23-3-2 is read in one pass. If your WMS strips separators on import, keep them on the label anyway and let the system map the two.
The six steps below take a facility from a blank floor plan to a labeled, scannable building. If you are mid-way through a warehouse setup project, do steps 1 to 4 before the first rack is bolted down. If the racks are already in, start at step 3 and budget for a relabel.
Start with the warehouse layout drawing, not the WMS. Mark every area that works differently: ambient racking, cooler, freezer, bulk floor stack, returns, staging and the pick module if you have one. Each of those becomes a zone, because each will carry different label materials, different equipment and often different count rules.
Then number the aisles in one direction across the building, from the wall nearest receiving to the far wall and keep that direction in every zone. A driver who learns that aisle numbers rise as they move away from the dock should never have to relearn it in the freezer. If the racking layout has cross aisles, note where they fall; they become the natural break points in the bay numbering in step 3.
In a column for Material Handling & Logistics (August 2004), retail, wholesale and manufacturing consultant Don Benson, PE, argued that location numbering systems should only include numerals. His reasoning still holds: a lettered sequence stops being intuitive beyond E, F or G, because nobody counts in letters. If you do use alphabetical characters, keep them for fields with five or six options at most, which in practice means the zone.
Where letters and digits mix, drop the characters that look alike. Skip the letter O and the letter I as zone codes, because a scanner does not care but a person reading 0-07-23 at the end of a shift does. Benson also recommended attaching numbers to the elements of the location (the level, the position) rather than only the aisle, which is what gives each aisle its own self-contained sub-system and keeps a transposed digit from sending a picker across the building.
Whether the facility is a two-aisle stockroom or a 500,000 square foot distribution center, keep the location numbering codes as short as the building allows. Short codes mean less to misread, smaller labels and a faster learning curve for new associates. The longer the code, the higher the chance that a scanner, or the person holding it, drops or transposes a digit in a rush.
Leave room for expansion by numbering aisles and bays in gaps rather than in a solid run. Start the first aisle at 10 instead of 01 and step by 10 (10, 20, 30), or start bays at 10 and jump to the next hundred at every cross aisle, so a new rack run can take an unused number without renumbering and relabeling the building. Two-digit fields with leading zeros give 99 values per field; three digits give 999. Pick the width for the warehouse you expect to have in five years, not the one you have today.
The trade-off is real: gaps make codes slightly less dense, and dense codes are easier to scan visually. A reasonable compromise for most operations is gaps in the aisle and bay fields, where expansion happens, and solid runs in the level and position fields, where it does not.
Assign numbers to the elements of the location, not to the aisle alone. Every address needs the following, in this order:
Number rack bays odd on one side of the aisle and even on the other, the way street addresses work, so a picker reading bay 23 knows it is on the left and bay 24 is directly across. Which side gets odd does not matter; keeping it the same in every aisle does. Number low to high from the same end of the building in every aisle, so bay 01 is always nearest the dock.
Formulated correctly, the address for a pallet in the dry goods zone, aisle 7, left side, bay 23, third beam up, right-hand slot reads: Zone D, Aisle 07, Bay 23, Level 3, Position 2, or D-07-23-3-2 on the label.
Because it is uncommon for racking to have more than nine levels, a single digit covers the level field for most operations. For small items in drawers or divided shelving, Benson’s column recommends a two-digit position using a 9 by 9 grid (row and column), which gives 81 slots per level without a third field.
Enter your zones, aisles, bays, levels and positions below. The planner sets the field widths, counts every address and label and exports the full location list as a CSV for the WMS or the label order.
CAMCODE
Location numbering planner
Enter your zones, aisles, bays, levels and positions. The planner sets the code format, counts every address and label you will need and exports the full location list as a CSV.
Addresses per zone = aisles x (bays per side x 2) x levels x positions. Beam labels cover levels 1 and 2 at every position; levels 3 and up are carried on one multi-level totem label per bay. Aisle signs = 2 per aisle. Zone signs = 1 per zone. Field widths are set from the largest value in any zone, with a minimum of two digits for aisle and bay. All counts are derived from your inputs; nothing is sent anywhere.
It is not possible for every operation, but the rule most experts recommend is one SKU per location at a time. Two SKUs in one address compromise the numbering system itself: the picker confirms the location, scans the wrong item and the WMS records a clean pick. Mixed locations are also where cycle counts go wrong, which matters because best-in-class operations hold inventory count accuracy by location at 99.9% in WERC’s DC Measures benchmarks.
For help deciding which SKU goes where, use the velocity data in your WMS to find the fastest-moving items and slot them into the most accessible addresses: the golden-zone levels (waist to shoulder height) in the bays nearest the pack stations.
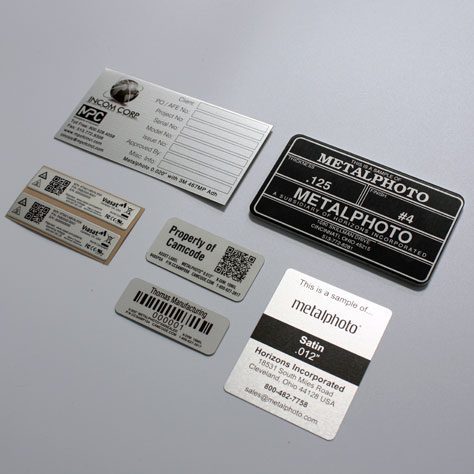
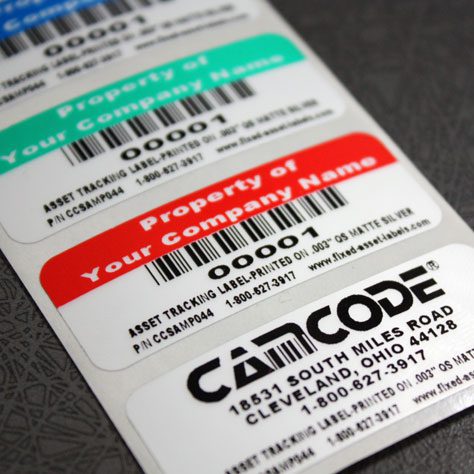
To label warehouse racks and bin locations, print each code as a barcode with human-readable text and place it where the scanner and the eye meet it: beam labels on the front of the rack beam for levels 1 and 2, a multi-level totem label on the upright for levels 3 and above, floor labels for bulk and staging positions, bin labels on the lip of each shelf bin and aisle signs at both ends of every aisle. Match the label material to the environment: polyester for ambient, cold storage labels for freezers, retroreflective for long-range scanning.
Camcode makes customized warehouse labels for each of those positions: warehouse rack labels for beams and uprights, floor label kits for bulk and staging locations, warehouse signs for aisles and zones, hanging labels for overhead and long-range scanning and cold storage labels rated for freezer temperatures. The full placement walkthrough, including label heights and arrow conventions, is in the rack labeling guide.
Load the full address list into the WMS before the labels go on, then walk the building scanning every label against the system. Any code that scans but does not resolve is a label in the wrong bay, and it is far cheaper to find it now than on the first wave of picks. Warehouse automation is your friend here: a WMS that validates each putaway scan against the address master will catch a mislabeled bay the first time it is used.
Take a 60,000 square foot facility with two zones. Zone D (dry goods) has 8 aisles of selective pallet rack, 20 bays on each side of every aisle, 4 beam levels and 2 pallet positions per level. Zone C (cooler) has 4 aisles, 12 bays per side, 3 levels and 2 positions.
The address count is the product of the fields in each zone:
The format is Z-AA-BB-L-P. Aisles run 10, 20, 30 through 80 in zone D (two digits, gapped by ten) and 10 through 40 in zone C. Bays run 01 to 40 per aisle, odd on the left and even on the right as you face away from the dock. Levels are 1 to 4 from the floor; positions are 1 and 2 from left to right. The first pallet position in the building is D-10-01-1-1; the last is C-40-24-3-2.
Labels follow from the count:
In this example building that is 1,664 beam labels, 416 totem labels, 24 aisle signs and 2 zone signs, before adding floor labels for staging and returns.
Three years later the operation adds an aisle of rack between aisles 30 and 40 in zone D. It becomes aisle 35. Nothing else is renumbered, no label is reprinted and the WMS address master gains 320 rows.
The best warehouse bin location numbering system for a small warehouse is the same five-field hierarchy, with the fields you do not need dropped. A single-room operation with no zones uses aisle-bay-level-bin (for example 03-14-2-05); a shelving-only operation can drop the pallet position and number bins left to right on each shelf.
Keep two-digit aisle and bay fields even if you have six aisles, because growth past nine is the point where single-digit schemes break.
A rack numbering system and a bin location numbering system differ only in the last field. On selective pallet rack, the position is a pallet slot (usually 1 or 2 per beam) and the address stops there. On shelving, flow rack or a pick module, the position is a bin, and bins run to two digits because a 48-inch shelf can hold eight or more of them.
Many facilities run both: pallet addresses in the reserve racking (D-07-23-3-2) and bin addresses in the forward pick area (P-02-05-2-07), with the zone letter telling the WMS which rules apply.
Floor locations follow the same pattern without a level or position: a bulk floor stack in zone B, lane 12 is simply B-12, marked with a floor label at the head of the lane. Staging, returns and dock doors get their own zone codes so a pallet parked at the dock has an address the WMS can hold it against.
The mistake to avoid is a second, unrelated scheme for shelving or the floor; one hierarchy with optional fields is easier to train and easier to query.
The pressure on accuracy is rising faster than the pressure on labor, according to Kardex Remstar’s 2025 survey of more than 100 North American warehouse leaders:
“The warehouse leaders we surveyed reported inventory control, space constraints and picking accuracy as the biggest issues they’re facing right now.”
– Cal Bowers, Senior Director of New Business for North America, Kardex Remstar. Modern Materials Handling, September 2025
Inventory control (62% named it their toughest hurdle) and picking accuracy (41%) are both location problems before they are technology problems. A numbering system that a new associate can read without training is the cheapest accuracy upgrade on the list.
Every one of these shows up in facilities that are relabeling two years after they opened:
The common thread is that each mistake is invisible on day one. A numbering system is judged by how it handles the first change, so design for the change.
A warehouse location numbering system is a few decisions made once: numerals over letters, fixed-width fields, odd and even bays, levels from the floor and gaps for growth. Made well, those decisions outlast the WMS, the racking and most of the people who set them up. Made badly, they show up as a relabeling project in year two.
When the scheme is set, the labels are the next decision. Request a free warehouse label sample kit to test rack, floor and cold storage materials in your building, or get a quote for a full location labeling package built to your address list.
Number locations from the largest element to the smallest: zone, aisle, bay, level, position. Give each field a fixed width with leading zeros, number bays odd on one side of the aisle and even on the other, count levels up from the floor and positions left to right and leave gaps in the aisle and bay sequences for growth.
A typical address reads D-07-23-3-2: zone D, aisle 07, bay 23, level 3, position 2.
A rack numbering system addresses pallet positions on racking, where the last field is a pallet slot (usually 1 or 2 per beam). A bin location numbering system addresses individual bins on shelving or in a pick module, where the last field is a bin number that can run to two digits.
Both use the same zone-aisle-bay-level hierarchy; only the final field changes.
Use numbers for aisles, bays, levels and positions, because numeric sequences stay intuitive at any length and sort correctly in a WMS. Letters work for the zone, where most warehouses have fewer than six options. Avoid the letters O and I in any code so they are never confused with 0 and 1 on a barcode label.
Most warehouse location codes run seven to nine characters plus separators: one for the zone, two for the aisle, two for the bay, one for the level and one or two for the position. Use two-digit aisle and bay fields even in a small warehouse, so the scheme survives growth past nine and add a third digit only if any single field will exceed 99.
Print each location code as a barcode with human-readable text and place it where the scanner meets it: beam labels on the rack beam for floor-level and second-level positions, multi-level totem labels on the upright for higher levels, floor labels for bulk and staging lanes, bin labels on shelf edges and aisle signs at both ends of each aisle.
Choose the material for the environment, such as polyester for ambient racking and freezer-rated labels for cold storage.
Yes. The planner on this page generates the full address list for your zones, aisles, bays, levels and positions and exports it as a CSV you can load into a WMS or use as a label print file. The worked example above (two zones, 3,136 addresses) shows the same output in prose.
The best numbering system for a small warehouse is the standard zone-aisle-bay-level-position hierarchy with the unused fields dropped. A single-room operation can omit the zone and use aisle-bay-level-bin (03-14-2-05). Keep two-digit aisle and bay fields and leave number gaps, because small warehouses grow, and renumbering is the most expensive fix in warehouse labeling.
Our sales engineers are experts in automatic asset tracking, tagging and identification, and can answer all your questions. Get in touch now.
Lets Talk ›Enter your information and get a free checklist of the top questions to answer and tips to plan a successful asset tagging project for any warehouse management system implementation.